|
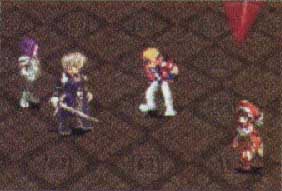
-- Big Joe (800 HP) |
-- You'll be seeing Big Joe in
a lot of places, but this is the only area where you can really
do battle with him. His attacks are really weak, however, his
fans in the crowd can heal him by about 140 HP per turn, and
they can also damage
you as high as 70 per turn.
Save your AP so that you can do deathblow combos on Big Joe,
right before the crowd heals him up. |
|
-- Scud (600 HP) |
-- Like Big Joe, Scud can't damage
you that much, and she can heal herself up real well. A deathblow
combo would prove best in this battle. |
|
-- Dan (450 HP) |
-- Dan is fairly weak, but as
the battle progresses, he'll build up more angst and therefore
increase his power. Keep your HP above 100, otherwise, Dan's
later attacks can kill
you in one turn. Don't
do combos, just use your strongest Deathblows. |
|
-- Wiseman (? HP) |
-- You can't damage Wiseman at
this point, and he'll leave after a few turns. You end up winning
by default. |
|
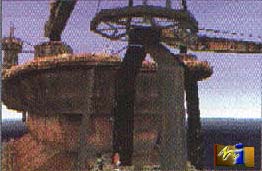
Fatima Castle,
Bledavik |
|
-- Ramsus (500 HP,
1,000 HP)
 |
After rescuing Margie using Bart,
Ramsus and Miang will confront you. There will be two battles,
and in the first one, you have only Bart in your party. Margie
will only heal you, and you can't control her. Fortunately, Ramsus
will be inflicting damage all by himself, with Miang healing
him often. Save your APs for a deathblow combo (make sure it's
a 20+ AP combo). Warning! Whenever Ramsus changes his stance
(Mirror stance), don't attack him! He'll be inflicting as much
damage as you did, even if it's not his turn. Instead of attacking,
just use this chance to cure yourself. After you give Ramsus
enough damage, Fei will appear and help you out. This now signals
the second battle, where Ramsus' HP is doubled, and Miang's curing
power is amplified. Good thing though, is that you now have Fei
in your party. Just use the same technique you did in the first
battle, and you'll easily win. |
|
Mountain Cave |
|
|
-- Wand Knights x2 (700 HP) |
-- Real easy foes, but conserve
your fuel.. there are other battles waiting after this one |
|
-- Claw Knights (600 HP), Sword
Knight (700 HP), Aegis Knight (700 HP) |
-- All these three will be battling
you all at once. Defeat the sword knight first, then go after
the Claw Knight, then the Aegis knight. Concentrate your blows
on one enemy at a time. |
|
-- Vierge (Elly) (2,500 HP) |
-- This one is tough to beat,
primarily because your HP and fuel are not replenished from the
last battle. Vierge's blow attacks are fairly tolerable, however,
her Aerods
attack is extremely powerful.
Don't use your booster, and just do deathblow attacks as soon
as you reach Level 1 or 2. Don't use X attacks since Vierge will
only be dodging them. |
|
Ignas Desert |
|
|
-- Main Gun (1,800 HP) |
-- You'll have to battle a sand
cruiser flanked by two small guns. Ignore the small guns and
focus your attacks on the Main Gun. |
|
-- Dora (Vanderkaum) (3,000 HP)
(700 HP shield) |
-- It'll take you about 5 or six
turns to break the shield. After that, you'll inflict greater
damage on Dora. If you have enough fuel, then use the booster |
|
Alley in Nortune |
|
-- Leonardo (500 HP)
Heinrich (500 HP)
Vargas (600 HP)
Suzarn (800 HP) |
-- The first two battles are easy.
However, Vargas can be a tough one so use 28 AP deathblow combos
on him. Be careful about Suzarn too, since his blows can easily
halve your HP in one turn. |
|
-- Rico |
-- You'll be forced to lose this
battle. |
Nortune Battling
Areas
 |
The early battles are easy, and
you can do more damage if you shoot ether bullets the moment
your opponent falls down. Using the hit-hit-hit-run technique would prove effective in winning,
and don't worry too much about the button combos as you can do
enough damage with just plain XXX or square-square-square. Don't
use ether bullets when your opponent is standing -- it has a
great chance of missing its target, or can easily be blocked.
Lastly, when your gauge is heating up, you can go for a swim
in the water parts to cool your engines faster than on normal
terrain. |
|
Kislev (Nortune)
Sewers |
|
-- Redrum (4,300 HP)
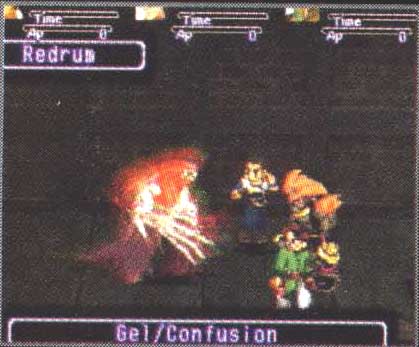 |
This opponent can be extremely
tough. He can steal all of a character's HP and use it to heal
himself. You'll want to have a lot of Zetasol before you face
this guy, since you'll be reviving your party quite a bit. Redrum
uses fire elemental attacks, thus, making water elemental attacks
effectively powerful on him. Save up your APs and give him 28+ deathblow combos. This will bring him down even before
he steals somebody's HP. It would be best that you also use Citan's
Renki and Healing abilities for the benefit of all members of
the party. |
Nortune
-- Wiseman (1,000 HP) |
You can use 15+ AP deathblow combos
on Wiseman, and this'll take him down easily. Remember to maintain
your HP above 100, or else he can knock you out before you do. |
|
Nortune Gear Dock |
|
-- Ranker R (600 HP)
Aegis Knight R (1,800 HP)
Sword Knight R(1,800 HP)
Claw Knight R (1,400 HP)
Wand Knight R (1,800 HP) |
-- These are the same guys you
battled before, but now they are powered up. However, they are
still the wussies like they usually were, so there'll be no problem
beating them up. |
|
-- Dominia (8,700 HP) |
-- Occasionally, the Hecht's cannon
will appear and will sit around for a couple or more turns. Don't
mind it, though... and concentrate your attacks on Dominia herself. |
|
Goliath Factory |
|
|
-- Grahf (? HP) |
-- You have no way of winning
this battle. Grahf will practically mop the floor with you. =) |
|
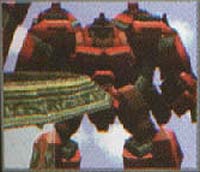
-- Goliath Guard (6,500 HP) |
-- During this battle, you need
to have a lot of fuel in order to use Boosters. Use level 1 and
2 attacks, as level 3 blows take more turns and would waste a
lot of time. Speed here is essential. |
|
Thames |
|
-- Haishao (Dominia) (2,700 HP)
Bladegash (Dominia)
(3,000 HP)
Haishao (Ramsus)
(4,000 HP) |
-- This battle is very similar
to the previous encoulnters you've had with Ramsus, except that
now, everyone is in Gears. Miang will still be there healing
Ramsus up, and Ramsus will be changing his stance as often as
usual. Use the same strategy as before, and use your booster
as early as possible. Use level 3
deathblows and the battle will end real soon, of course, in your
favor. |
|
Reaper's Ship |
|
|
-- Bloody (4,300 HP) |
-- This foe is the same as Redrum,
but with more powerful attacks. Use combo attacks as usual |
|
-- Giant Wels (4,300 HP) |
-- You can only use Billy's square
attack here since most of the normal attacks will deal him minimal
damage. Don't
use ether attacks as those
will only power up your opponent. |
|
Zeboim |
|
|
-- Seraphita (2,000 HP), Tolone
(2,500 HP) |
-- Focus your attacks on Seraphita
first, since she's the weaker of the two. Tolone's attacks are
wind-based, so it'd be wise to use wind-element protection, or
earth-based attacks. |
-- Id (3,000 HP)
 |
-- This is probably the hardest,
gearless battle you'll be encountering before you reach Disc
2. Id's attacks can kill your party in two turns, and can bring
down two characters in one turn. It'd be wise to bring Citan
Uzuki with you, since his speed is twice Id's. Citan will be
getting two turns before Id does, so better make advantage of
this and use one of his turns for curing your party. Revive your
members as soon as they die, because Id can wipe two people out
in one turn -- so having one member still alive can lessen the
chance of a gameover. Take heed... do not use deathblow combos on Id, and instead use your strongest
individual deathblows in every turn. If you're using Elly, then
it'd be best if you use ether attacks rather than her deathblows
-- her magic is stronger than her blows by this point in time.
Lastly, equip everybody with the speed accessory, because speed
is very essential here. |
|
Yggdrasil |
|
-- Alkanshel (Stone)
(12,000 HP) |
-- It'd be best if you pre-equip
your gears with Hp restoring parts (FIX FRAME) before your face
Stone's gear. This battle will be real tough, since he has more
HP than any of the previous enemies. During the first few rounds
you won't be damaging Alkanshel that much, but in the later parts
of the battle, you'll be inflicting progressive damage. Stone
will sometimes use a technique that will halve your HP, so it
won't be a good idea to heal often unless necessary -- you'll
be saving fuel this way. |
|
Babel Tower |
|
-- Wyvern (Ramsus)
(5,000 HP) |
-- As usual, Miang will be there
to cure Ramsus up, about 1,200 HP per turn. This battle is easy
that you only need to use Level 1 attacks . |
-- Siebzehn (Maria)
(5,500 HP) |
-- She's easier to beat than Ramsus
in the last battle. No special techniques needed |
|
Shevat |
|
-- Generator 1:
Solaris Guardsx6 (500 HP)
Littlefoot x2 (500 HP) |
-- It'd be best if you use Elly
in  this
part. Her ether area-wide attacks can take out the guards all
at once, and damage the littlefoots, if not bring them down in
one turn. Don't use anybody who doesn't have area attacks --
it'll take more time killing just one guard every turn. this
part. Her ether area-wide attacks can take out the guards all
at once, and damage the littlefoots, if not bring them down in
one turn. Don't use anybody who doesn't have area attacks --
it'll take more time killing just one guard every turn. |
-- Generator 2:
White Knights x3 (300 HP) |
-- This isn't too much. You can
use practically anybody. Billy would certainly do. |
-- Generator 3:
White Knights x2 (300 HP)
Citadel (5,000 HP) |
-- You're better off using Citan
here, since you'll be needing his speed. Take out the White knights
first, then go after the Citadel. Citadel has a sonic boom attack
that could chip off 4,000
HP per turn, so it'd best
if you equip your gear with FIX FRAME parts before the battle. |
-- Generator 4:
White Knights x2 (300 HP)
Avalanche (5,000 HP) |
-- This is the toughest battle
between the four generators. Better use your most powerful character
here, preferrably Fei. |
-- Achtzehn (Nikolai)
(3,000 HP, 8,000 HP)
 |
-- Insanely easy, even with using
just Chuchu. Just use your X or square attacks and Level 1 deathblows
on him. After this battle, you can now use level 7 human deathblows,
plus Yggdrasil can now fly. Citan will also be using his Katana
skills from this point onwards.. making him one of the most powerful characters in your party. |
Ignas Gate Cave
(Solaris
Gate #1) |
|
|
-- Shakhan (18,000 HP) |
This battle is the first one where
your Gears have a reasonable chance of reaching Attack Level
Infinity. Because Shakhan heals himself a lot, you'll want to
use your boosters right away. You should also have Maria in your
party, since her gear is very powerful. Also make sure that you
have your FIX
FRAME parts equipped, plus
seal/electric attack accessories. Build up your attacks until
they reach INFINITY LEVEL while Shakhan is healing himself up,
for he cannot reach you while he's hooked to the gate. Once he
lets go of the gate, rain all your strongest attacks before he
can again hook up to the gate for healing. You have approximately
3 - 4 turns before he heals himself up again, so better make
sure you inflict as much damage before his healing turn. |
|
Babel Tower and
Ft. Jasper (Solaris Gate #2) |
|
-- Battles 1 & 3
Bladegash (Dominia)
(5,000 HP)
Marine Basher (Kelvena)
(5,000 HP) |
-- Better go after Marinebasher
first, since she's the one who does all the healing. As for Bladegash,
take note that she can change her elemental attack once every
turn. In her next turn, she'll be attacking you with her sword,
using the element she just charged in her previous turn. This
will inflict double the damage compared to her elementless attacks.
You can, however, cancel her elemental charging by attacking
her with an element opposite the one she just charged with. For
example, if she charges with water, you must attack her with
fire before her next turn. Remember to conserve your fuel because
you still have another battle after this. |
-- Battles 2 & 4
Grandgrowl (Seraphita)
(6,000 HP)
Skyghene (Tolone)
(5,000 HP) |
-- Attack Skyghene first because
she has less HP and she can inflict more damage. Take heed on
using some of the character's Level 2 and 3 deathblows.. sometimes
they can heal the opponent. Again, conserve fuel since you'll
be battling these two twice. |
Undersea Gate
Cave
(Solaris Gate #3) |
|
|
-- Crescens (14,800 HP) |
-- This battle shouldn't be too
hard at all, even if Crescens has a lot of HP. Simply use your
Level 1 and 2 attacks on her. |
|
Solaris |
|
-- Executioner (5,000 HP)
Grahf (7,000 HP) |
-- This is the last battle
you'll be having before you turn over to Disc 2. This will be
a bit harder than usual, because both enemies aren't total
pushovers. Attack Executioner first, since she can kill your
characters easily than Grahf. Use your strongest deathblows right
away, and you can kill her in three turns. As for Grahf, you
can choose saving your AP for combos, but regular deathblows
can be sufficient. usual, because both enemies aren't total
pushovers. Attack Executioner first, since she can kill your
characters easily than Grahf. Use your strongest deathblows right
away, and you can kill her in three turns. As for Grahf, you
can choose saving your AP for combos, but regular deathblows
can be sufficient. |


 one
for disc one bosses, and one for Disc 2. This page contains all
the Disc 1 bosses in chronological order. To go to the disc 2
bosses,
one
for disc one bosses, and one for Disc 2. This page contains all
the Disc 1 bosses in chronological order. To go to the disc 2
bosses,